

Watercolor Painting Ideas for Beginners at Home
Table of Contents
-
Easy Watercolor Paintings for Beginners: 8 Ideas to Try at Home
- Start with Loose Florals and Poppies
- Paint Simple Landscapes and Seascapes
- Try Geometric Patterns and Circles
- Add Fruit Studies and Other Simple Still Life Subjects
- Explore Nature Subjects Like Feathers and Dragonflies
- Practice Line and Wash
- Paint Abstract Washes and Color Play
- Match the Project to Your Skill Level
- Watercolor Supplies for Beginners: What You Actually Need
- Beginner Watercolor Techniques That Make Painting Easier
- Set Up a Simple At-Home Painting Space
- Watercolor Painting Ideas for Beginners at Home: Abstract Washes and Color Play
- Troubleshooting Common Watercolor Mistakes
- Frequently Asked Questions
Last Updated: October 16, 2026
Easy Watercolor Paintings for Beginners: 8 Ideas to Try at Home
Watercolor painting is a beginner-friendly art form that asks for very little: paper, a brush, a few paints, and a cup of water.

The best part about watercolor is how forgiving it is. Colors blend on their own, mistakes lift away with a damp brush, and a single sheet of paper can become a finished piece in under an hour. Below, we break the ideas into skill levels so you can start where you are and build from there.
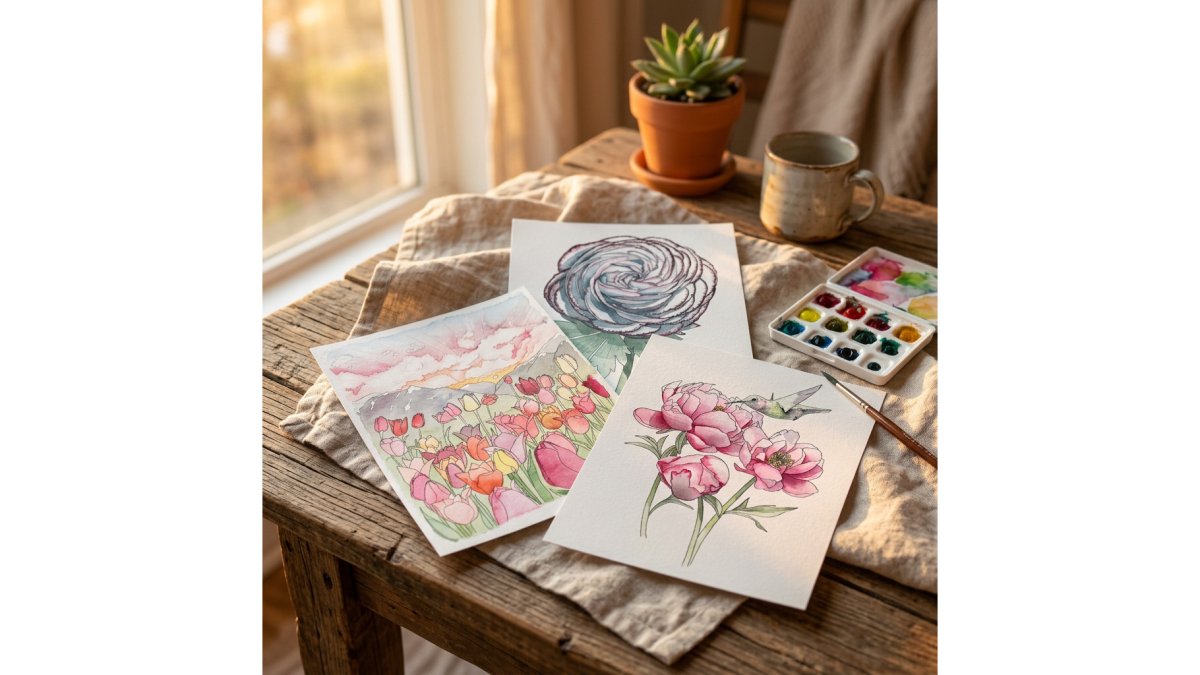
Start with Loose Florals and Poppies
Loose florals are the classic first project because they reward a relaxed hand. Poppies work especially well: a few soft petal shapes, a dark center, and a thin green stem are enough to suggest a whole flower. Yellow poppies are a favorite starting point since the color stays bright even when the paint dries.
Load your brush with water, touch it to the paper, and let the paint bloom outward rather than drawing every petal edge. Repeat with three or four flowers at different sizes, then add stems once the petals are dry. If you want the outlines already drawn for you, our Spring Florals Watercolor Painting Kit includes three outlined floral designs, twelve professional paint dots, a brush, and a mixing palette, plus paint-along videos for each design.
Paint Simple Landscapes and Seascapes
A simple landscape or seascape teaches you how water and pigment behave together. Paint a wash for the sky, let it dry slightly, then drop in a horizon line and a band of water below it. A seascape needs only three shapes: sky, sea, and a thin strip of sand or shoreline.
Keep the palette small. Two blues, one warm tone for the land, and a soft gray for distant hills are plenty. Paint the sky first while the paper is damp so the colors bleed into each other, then let everything dry completely before adding any foreground detail.
Try Geometric Patterns and Circles
Geometric patterns are the easiest way to practice control without needing to draw anything recognizable. Overlapping circles, a grid of squares, or a row of soft arcs all work. Paint each shape with a different color wash and let the edges touch so the pigments blend at the seams.
This is also a good exercise for line and wash. Draw a few light pencil lines first, paint inside them, then go back with a fine brush or pen to add definition. The result looks intentional even when the washes wander.
Add Fruit Studies and Other Simple Still Life Subjects
Fruit studies teach color mixing better than almost anything else. A single lemon, apple, or pear gives you a round shape, a highlight, and a shadow to practice. Paint the base color first, then drop a deeper tone into one side while the paper is still damp for a soft shadow.
Household objects work just as well: a mug, a small vase, or a bowl of garden veggies on the counter. Our Garden Veggies Watercolor Painting Kit comes with three outlined designs, so you can focus on color and brushwork instead of sketching.
Explore Nature Subjects Like Feathers and Dragonflies
Feathers and dragonflies are forgiving subjects because their shapes are already loose. A feather is a soft oval with a spine down the middle; a dragonfly is a thin body with four light wings. Paint the wings with very little pigment so they stay translucent.
Nature subjects also give you a reason to practice wet-in-wet technique. Touch a wet brush to damp paper and watch the color spread on its own. That soft, uncontrolled edge is exactly what makes watercolor look like watercolor.
Practice Line and Wash
Line and wash combines a simple ink or pencil drawing with a loose watercolor layer on top. Draw the outline first, paint over it with light washes, then add a few darker lines once the paint dries. It is one of the fastest ways to make a beginner painting look finished.
Paint Abstract Washes and Color Play
Abstract painting removes the pressure of getting a shape right. Pick three colors that appeal to you, paint them side by side, and let them meet in the middle. Tilt the paper to move the pigment, or drop clean water into a wet wash to push the color outward.
Color wash projects are also the best use of leftover paint at the end of a session. Nothing is wasted, and you end up with a small abstract you can frame or use as a bookmark.
Match the Project to Your Skill Level
Not every idea suits every beginner. Use this table to pick a starting point based on how much control you want to practice.
| Project | Skill Level | Time | What It Teaches |
|---|---|---|---|
| Abstract color wash | First painting | 15-20 min | Wet-in-wet blending |
| Geometric circles | First painting | 20-30 min | Brush control, layering |
| Loose poppies | Early beginner | 30-45 min | Soft edges, color mixing |
| Feathers and dragonflies | Early beginner | 30-45 min | Translucency, light washes |
| Fruit studies | Confident beginner | 45-60 min | Shape, shadow, highlights |
| Simple seascape | Confident beginner | 45-60 min | Layering, drying times |
| Line and wash | Confident beginner | 45-60 min | Combining drawing and paint |
Watercolor Supplies for Beginners: What You Actually Need
The watercolor supplies for beginners list is shorter than most people expect. You need paper, paint, one brush, and water. Everything else is optional.
Start with cold-press watercolor paper around 140 lb, since thinner paper buckles when it gets wet. A size 4 round brush covers fine detail and small washes. For paint, a small set of professional paint dots gives you real pigment without buying full tubes. Add a mixing palette and a cup of water, and you are ready.
If you would rather skip the shopping list entirely, our Winter Woods Watercolor Painting Kit bundles all of it: three outlined designs on 140 lb cold-press paper, a compostable palette, twelve Da Vinci paint dots, a size 4 round brush, and a bonus Watercolor Basics Course.

Beginner Watercolor Techniques That Make Painting Easier
Three techniques carry most beginner paintings: wet-in-wet, layering, and dry brush. Learning when to use each one removes most of the guesswork.
Wet-in-wet means painting on damp paper so colors spread and blend on their own. It is ideal for skies, petals, and soft backgrounds. Layering means letting one wash dry completely before adding the next, which builds depth without muddying colors. Dry brush uses a mostly dry brush on dry paper for texture, like bark or grass.
A medium water brush makes all three easier when you are working away from a sink. Fill the handle with water, squeeze gently, and water flows through the bristles as you paint. Our Medium Water Brush is a simple addition for travel, outdoor sketching, or anyone who would rather not set up a full station.
Set Up a Simple At-Home Painting Space
An at-home painting space needs about two feet of table, good light, and a place to set your water cup. That is it. You do not need a studio.
Here is a checklist for a setup you can leave in place or pack away in five minutes:
- A flat surface near a window with indirect daylight
- Watercolor paper and a backing board or clipboard
- One round brush and a water cup
- A mixing palette with a few wells
- A roll of paper towels for blotting and lifting
- A small jar or tin to store supplies between sessions
- A folder or sleeve for finished paintings
Watercolor Painting Ideas for Beginners at Home: Abstract Washes and Color Play
Abstract washes are the lowest-pressure way to build confidence with watercolor painting. There is no reference to match and no shape to get right, so the only goal is to see how the colors behave.
Try a three-color wash: pick a warm tone, a cool tone, and a neutral, then paint them in overlapping bands. Tilt the board to let the pigments run together, then stop and let it dry. The result is a small abstract you can frame, use as a card, or keep in a sketchbook as a record of what those colors do together.
For a more structured version, our Feminist Florals Watercolor Painting Kit pairs outlined floral designs with paint-along videos, so you can follow along once and then paint the same design your own way.

Troubleshooting Common Watercolor Mistakes
Most beginner frustration comes from four fixable problems. Here is what goes wrong and how to correct it.
| Problem | Why It Happens | The Fix |
|---|---|---|
| Colors turn muddy | Too many layers on wet paper | Let each layer dry fully before adding the next |
| Paper buckles or pills | Paper too thin or overworked | Use 140 lb cold-press and lift color gently |
| Washes look streaky | Too little water in the mix | Add water to the puddle, not just the brush |
| Hard, outline-like edges | Painting on dry paper only | Try wet-in-wet for soft edges |
Two more habits help. Do not scrub the paper with a dry brush, since that damages the surface and shows in the final piece. And keep a scrap sheet nearby to test a color before it goes on your painting.
Watercolor rewards the person who simply starts. The first painting will not be perfect, and it does not need to be. What matters is having the supplies within reach, a project matched to your skill level, and a few minutes at the table.
At Elamae, we make that first step easier with creative kits built for real beginners: outlined designs on 140 lb cold-press paper, professional Da Vinci paint dots, a size 4 round brush, a compostable mixing palette, paint-along videos for every design, and a bonus Watercolor Basics Course.
Frequently Asked Questions
What is the easiest thing to paint in watercolor?
Loose florals, simple landscapes, and abstract color washes are the most forgiving subjects for beginners. Outlined designs remove the pressure of drawing freehand, letting you focus on brushwork and color. Kits like the Spring Florals Watercolor Painting Kit come with pre-drawn designs and paint-along videos, so you can start painting within minutes of opening the box.
What supplies do beginners need for watercolor painting?
You need watercolor paper (140 lb cold-press is a good starting weight), a set of paints, a round brush, a mixing palette, and a cup of water. A water brush is a handy alternative that holds water in the handle. Beginner kits bundle all of these together, which saves you from buying full-size tubes and pads before you know what you like.
How do I keep my watercolor paintings from looking muddy?
Muddy color usually comes from overworking the paper or mixing too many pigments together. Let each layer dry before adding the next, and limit yourself to two or three colors per mix. Rinse your brush between colors, and avoid scrubbing the paper once the paint has started to set. Practicing on a swatch sheet before committing to your painting helps you see how colors interact.
How can I practice watercolor techniques at home?
Set aside 15 to 20 minutes a day for small practice sessions. Try wet-in-wet washes, layering, and simple brushstrokes on scrap paper before applying them to a finished piece. Mini kits with pre-drawn designs give you a low-stakes way to practice, and paint-along videos walk you through each technique step by step so you build skills without guesswork.